
How to Maximize Your Build and Kill Zombies Record Distance: Ultimate Car Guide
Master the art of vehicle construction and fuel management to reach a new build and kill zombies record distance. Learn part rolling, blueprints, and skill
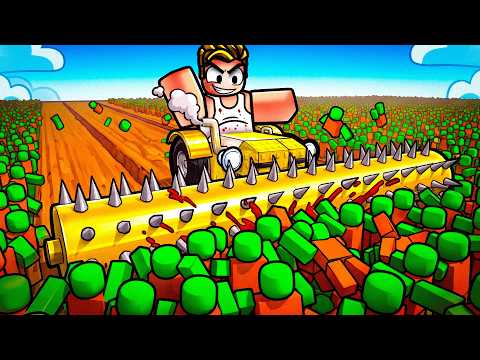 Official mediaMaster the art of vehicle construction and fuel management to reach a new build and kill zombies record distance. Learn part rolling, blueprints, and skillYouTube
 Reaching a new build and kill zombies record distance is the ultimate badge of honor for any survivor in this high-octane vehicular combat game. The loop is deceptively simple: you build a car, drive it until it explodes or runs out of gas, and use the earned cash to do it all over again. However, achieving a massive build and kill zombies record distance requires more than just slapping wheels onto a chassis; it demands a deep understanding of physics, fuel efficiency, and tactical part rolling.
In the early stages of the game, players often find themselves frustrated by the "Out of Fuel!" message that flashes across the screen just as they gain momentum. This guide will break down the mechanics of the run loop, the intricacies of the CAR PARTS machine, and the strategic skill tree investments necessary to dominate the leaderboards. By treating every run as a scientific test, you can systematically improve your vehicle and push the boundaries of how far a zombie-crushing machine can go.
The Core Gameplay Loop: Distance Equals Wealth
In Build and Kill Zombies, your primary objective is to travel as far as possible down a linear track infested with the undead. The game operates on a straightforward "distance in, cash out" philosophy. As you drive, a live HUD tracks your progress starting from Distance: 0. Every meter you cover and every zombie you pulped adds to your final payout.
The run ends under two conditions: your car is destroyed by obstacles, or, more commonly, you run out of fuel. When the car finally grinds to a halt, the results screen displays your total distance. If you have successfully surpassed your previous attempt, a "New distance record!" banner appears. This banner is the most critical feedback loop in the game, signaling that your recent modifications were effective.
Understanding the Fuel Constraint
Early in your career, fuel is your greatest enemy. Many players make the mistake of rolling for the most powerful engine available, only to realize that a high-consumption engine with a small fuel tank leads to a very short trip. To maximize your distance, you must treat Engines and Fuel Tanks as a symbiotic pair. A fast car that runs out of gas in thirty seconds will always be outperformed by a slower, more efficient build that can chug along for minutes.
| Run Outcome | Trigger Condition | Player Action Required |
|---|---|---|
| Out of Fuel! | Fuel gauge hits zero | Return to lobby and upgrade fuel capacity |
| New Distance Record! | Surpassed previous best distance | Keep current build and tweak one minor part |
| Vehicle Destroyed | Chassis HP hits zero | Add armor or reposition weapons to protect the frame |
| Cash Collected | Run completion | Roll for new parts or upgrade skills |
Mastering the CAR PARTS Machine
Unlike many building games where you buy specific items from a menu, this title utilizes a "Gacha" style rolling system. You stand at the CAR PARTS station and spend your hard-earned cash to roll for random components within specific categories. Community reports suggest that while the randomness can be frustrating, it forces players to be creative with the parts they receive.
The Cost of Innovation
Prices for parts scale based on their perceived utility and rarity. For example, a basic Glass Cylinder—often used as a filler block for the chassis—costs a mere $15. In contrast, a Shredder, which is essential for clearing zombies without damaging your car’s frame, costs $250.
If you are looking for a specific part to complete a build, look for dedicated roll stations. Some areas of the lobby feature machines that only roll for Crossbows or Glass Cylinders. These are slightly more expensive but remove the RNG (random number generation) of the general pool.
| Part Name | Rarity | Base Cost | Primary Function |
|---|---|---|---|
| Glass Cylinder | Common | $15 | Lightweight chassis filler |
| Basic Wheel | Common | $50 | Standard mobility |
| Crossbow | Uncommon | $150 | Ranged zombie elimination |
| Shredder | Uncommon | $250 | Front-facing melee damage |
| Small Fuel Tank | Common | $100 | Basic energy storage |
Handling Duplicates
Do not be discouraged if you roll five Glass Cylinders in a row. As you progress and unlock larger building plots, you will need a significant amount of "filler" parts to create a stable, wide chassis. A wider car is less likely to flip over when hitting groups of zombies, and these cheap parts provide the surface area needed to mount multiple weapons.
Advanced Build Mode Strategies
Once you have a collection of parts, it is time to enter Build Mode. The interface is divided into two primary tabs: VEHICLE and WEAPONS. According to player experience, the most successful builders always complete the vehicle frame before even looking at the weapons tab.
The Foundation (VEHICLE Tab)
Your car needs a low center of gravity. Place your heaviest components—the engine and fuel tanks—as low and as central as possible. If the car is top-heavy, it will flip the moment you hit a ramp or a large cluster of zombies, ending your quest for a new build and kill zombies record distance prematurely.
- Start with the Wheels: Space them out to create a wide stance.
- Lay the Chassis: Use your Glass Cylinders or blocks to connect the wheels.
- Place the Engine: Ensure it is protected by blocks so it doesn't take direct damage.
- Add Fuel: Mount as many fuel tanks as your weight limit allows.
The Arsenal (WEAPONS Tab)
Weapons should be placed strategically to protect the vehicle's integrity. The Shredder is widely considered the best front-facing weapon. By mounting it on the very front face of your car, it makes contact with zombies before they can touch your chassis. This prevents the "collision damage" that slowly chips away at your car's health.
| Weapon Type | Best Placement | Pros | Cons |
|---|---|---|---|
| Shredder | Front Bumper | High damage, protects frame | Short range |
| Crossbow | Top / Roof | Ranged kills, clears path early | Slow fire rate |
| Spikes | Sides | Prevents flanking damage | Minimal forward utility |
| Flamethrower | Front / Sides | Area of effect damage | High "energy" cost |
Utilizing Blueprints for Success
For players who find the building mechanics overwhelming, the game offers a "Car Builds" menu. These are pre-made blueprints that serve as both a goal and a shopping list. The two most famous early-game blueprints are the Fast Furious and the Blue Monster.
When you select a blueprint, the game will highlight which parts you currently own and which ones you still need to roll for. This is the most efficient way to play if you want to reach a high build and kill zombies record distance without spending hours in the editor. Once all parts are collected, you can simply hit the "Spawn" button to have the car auto-assembled on your plot.
Blueprint Comparison Table
| Blueprint Name | Difficulty to Build | Key Strength | Best For |
|---|---|---|---|
| Fast Furious | Easy | High Top Speed | Short, high-intensity runs |
| Blue Monster | Medium | Durability & Fuel | Breaking distance records |
| The Tanker | Hard | Massive Health | Grinding cash in heavy crowds |
For those who want to skip the grind, blueprints can also be purchased with Robux, though most veterans recommend the satisfaction of rolling the parts yourself. You can find more information on the game's community hubs or the official Roblox platform to see what other players are building.
The Skill Tree: Permanent Progression
While car parts can be lost or changed, the Skills menu represents your permanent progress. The skill tree is a branching system where nodes are purchased with the same cash earned from runs. Investing in the right skills is the secret to reaching an elite build and kill zombies record distance.
Key Skill Nodes to Prioritize
- Luck I & II: These nodes improve your outcomes at the CAR PARTS machine. Higher luck means a better chance of rolling Rare or Epic parts instead of basic Glass Cylinders.
- Gold Roll I: This unlocks access to a higher-grade roll station, allowing you to bypass the low-tier junk entirely.
- Fuel Efficiency: Reduces the rate at which your engine consumes fuel.
- Zombie Bounty: Increases the cash reward for every zombie killed, accelerating your ability to buy new parts.
| Skill Tier | Node Name | Effect | Cost Category |
|---|---|---|---|
| Tier 1 | Luck I | +5% Rare Part Chance | Low |
| Tier 1 | Engine Tuning I | +10% Max Speed | Low |
| Tier 2 | Gold Roll I | Unlocks Gold Machine | Medium |
| Tier 3 | Luck II | +10% Rare Part Chance | High |
| Tier 3 | Tank Expansion | +20% Fuel Capacity | High |
Pro Tips for Breaking Records
To truly master the game, you must adopt a "test and tune" mindset. The fastest way to improve is to treat each run as a single experiment. If you change five things at once and your distance improves, you won't know which of those five things actually helped.
- The One-Part Rule: Change only one component (e.g., add one fuel tank or swap one engine) and then perform a run. If the distance number moves up, keep the change.
- Weight Management: Every part you add increases the weight of the car. If the car becomes too heavy, your engine will struggle to move it, actually decreasing your fuel efficiency.
- Server Patience: Servers are capped at five players. There is no need to rush your build. Take your time in the lobby to ensure your weapon placement is symmetrical and your center of gravity is low.
- Zombie Synergy: Killing zombies gives you a small speed boost in some versions of the game. Use Shredders to ensure you are constantly hitting zombies to maintain momentum.
By following these strategies and focusing on the synergy between fuel and engine power, you will soon see that "New distance record!" banner more often than not. Consistency is key, and with a bit of luck at the CAR PARTS machine, you'll be well on your way to a legendary build and kill zombies record distance.
Frequently Asked Questions
What is the best way to increase my build and kill zombies record distance?
The most effective way to increase your distance is to focus on fuel capacity and fuel efficiency skills. While speed is exciting, most runs end because the car runs out of gas. Balancing a moderately fast engine with multiple fuel tanks will almost always result in a longer run than a super-fast engine with a single tank.
Are blueprints better than custom builds?
Blueprints like the Blue Monster are excellent for beginners because they provide a balanced chassis that is guaranteed to work. However, as you collect more specialized parts, a custom build tailored to your specific skill tree upgrades will eventually outperform any standard blueprint.
How do I get more cash for part rolls?
Cash is earned based on the distance you travel and the number of zombies you destroy. To maximize cash flow, equip front-facing weapons like Shredders or Spikes to ensure you are killing as many zombies as possible during your journey. Also, invest in the "Zombie Bounty" skill early on.
Why does my car flip over immediately?
If your car flips, your center of gravity is too high or your wheelbase is too narrow. Try moving your engine and fuel tanks to the lowest possible point on the chassis and spreading your wheels further apart to create a more stable base.
Related Guides
Build and Kill Zombies Best Car Build: The Ultimate Guide to Dominating the Horde
Master the undead with our ultimate Build and Kill Zombies best car build guide. Learn how to optimize your vehicle, maximize fuel, and earn more cash toda
Master the Build and Kill Zombies Build Mode: A Survival Guide for Modern Gamers
Learn how to dominate the build and kill zombies build mode with our comprehensive guide on structures, tower defense, and resource management.
Master Your Build and Kill Zombies Car Upgrades: The Ultimate Guide to Survival
Unlock the best build and kill zombies car upgrades with our comprehensive guide. Learn about codes, part tiers, and advanced automation strategies.
Mastering Build and Kill Zombies Car Blueprints: The Ultimate Guide to Surviving the Horde
Learn how to optimize your vehicle using the best Build and Kill Zombies car blueprints, essential skills, and effective strategies for endless survival.